

When I first started learning how to design a website layout with WordPress, I made every beginner mistake possible — using flashy sliders, too many animations, and complicated multi-column designs. But I quickly realized that simplicity always performs better. According to HubSpot, websites with a clean layout and a single clear call-to-action see over 50% more engagement.
That’s when I switched to a minimalist layout built with Elementor — and the results were immediate. My bounce rate dropped, and visitors stayed longer on my pages.
Imagine this — you visit a website, and everything just feels right.
The colors blend beautifully, the sections flow naturally, and before you know it, you’re scrolling deeper into the content.
Now picture the opposite — cluttered text, awkward spacing, buttons that look misplaced… You’d probably close the tab within seconds.
That’s the real power of WordPress website layout design.
It’s not just about how your site looks — it’s about how it feels and functions for your visitors.
If you’ve already installed WordPress and chosen your theme (if not, check out my earlier guides like How to Install WordPress for Beginners), then this is your next big step.
In this complete 2025 guide, you’ll learn how to design a professional website layout with WordPress — step by step.
By the end, you’ll know exactly how to structure your homepage, pages, and blog posts in a way that builds trust, engages visitors, and makes your site look like it was built by a professional designer.
Let’s dive in.
how to design a website layout with WordPress
Table of Contents
What Is Website Layout (and Why It Matters So Much)
A website layout is like the blueprint of your online home.
It defines how content, images, and sections are arranged — shaping how visitors experience your website.
A well-structured layout:
- Guides visitors naturally through your content.
- Highlights your key message and offers.
- Builds trust and improves readability.
- Makes your site look clean, modern, and professional.
In contrast, a poor layout confuses users. They don’t know where to click, what to read, or how to navigate — and they leave.
In WordPress, your layout is built through:
- Your theme (the basic structure).
- The page builder or block editor (how you design sections).
- Your content arrangement (what you show and in what order).
So, before you start dragging widgets or adding colors, let’s first understand what type of layout fits your goal.
2. Step 1: Define Your Goal and Audience
Your website layout should always begin with clarity — not design.
Ask yourself:
- What is the main goal of my website?
- Who am I trying to reach?
- What action should visitors take after landing on my page?
For example:
- If your goal is to educate, your layout should focus on clear navigation and readability (perfect for bloggers).
- If your goal is to sell, highlight your products or services with visual hierarchy and strong CTAs.
- If your goal is to build authority, your layout should showcase testimonials, expertise, and contact sections.
Tip:
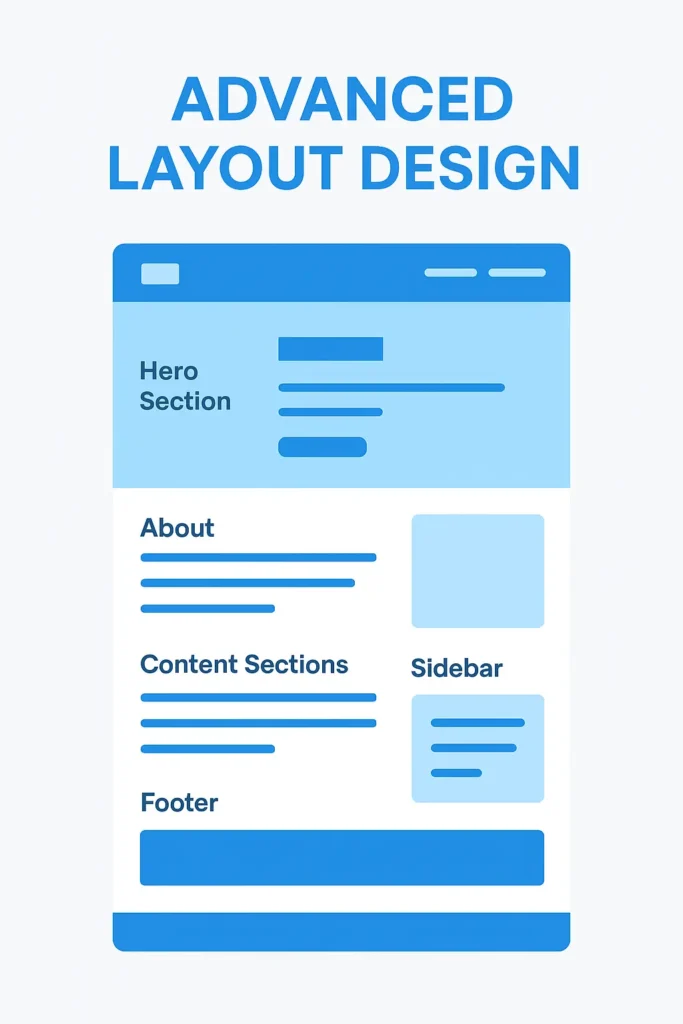
Before designing, draw a rough wireframe on paper — outline your header, sections, sidebar, and footer. It helps you visualize structure before you start designing.
3. Step 2: Choose a Flexible WordPress Theme
Your WordPress theme acts as the foundation of your layout.
Choosing the right one determines how much freedom you’ll have when customizing your pages.
A good theme should be:
- Lightweight and fast-loading
- Responsive (mobile-friendly)
- Compatible with page builders
- Customizable (headers, footers, colors, typography)
Some beginner-friendly themes that make layout design easy:
- Astra – perfect for blogs and small businesses.
- GeneratePress – fast and developer-friendly.
- Kadence – modern and intuitive.
- Blocksy – great for creative layouts.
If you haven’t chosen one yet, read my detailed post on How to Choose the Best WordPress Theme for Your Website.
Once installed, go to
Appearance → Customize
Here you can adjust:
- Layout width
- Header and footer design
- Container spacing
- Sidebar placement
Spend some time exploring — this is where your website’s “frame” takes shape.
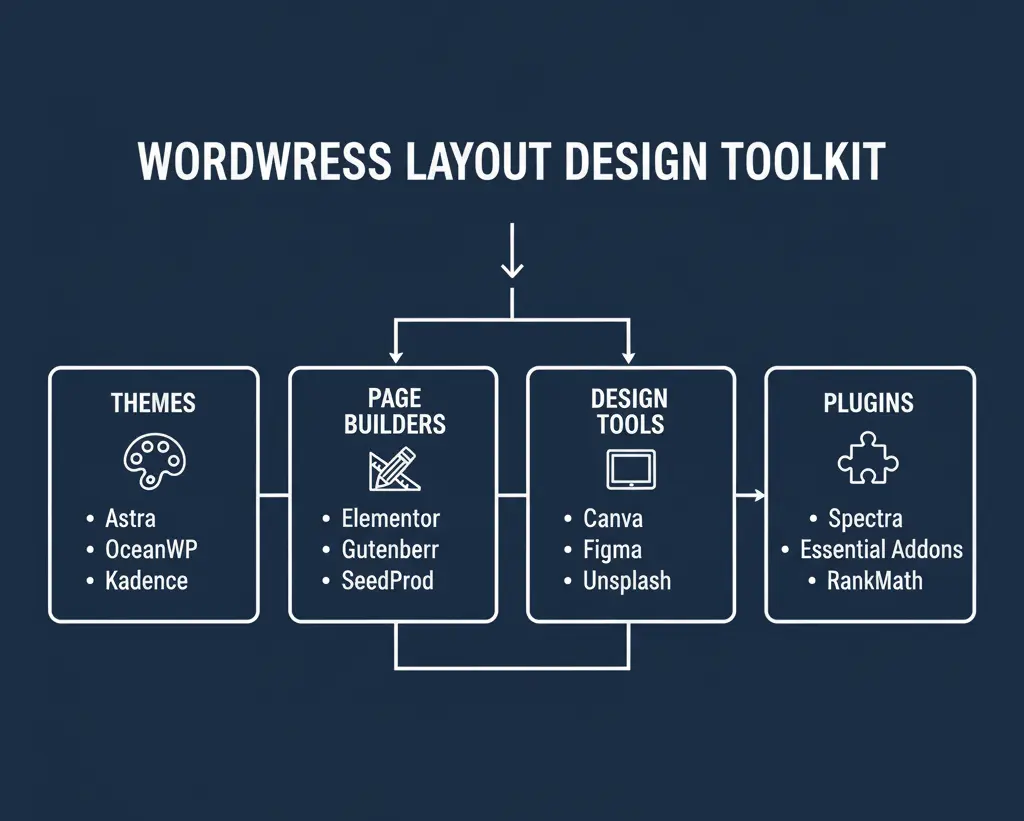
4. Step 3: Install Must-Have Plugins for Design
Before diving into layout building, make sure your site has the right tools.
Plugins help you add functionality and flexibility without coding.
For layout design, here are must-haves:
- Elementor or Gutenberg – visual page builders.
- Happy Addons / Essential Addons – extra design widgets.
- Smush – image optimization for faster loading.
- Site Kit by Google – check analytics while designing.
If you haven’t installed your essential tools yet, check out my post: 10 Must-Have WordPress Plugins for Beginners (2025).
These plugins make your layout smoother, faster, and easier to customize — all while keeping your design consistent.
5. Step 4: Start with a Clean Homepage Layout
Your homepage is your first impression.
Visitors decide within seconds whether to stay or leave.
So your homepage layout needs to instantly communicate what your site is about and why it matters.
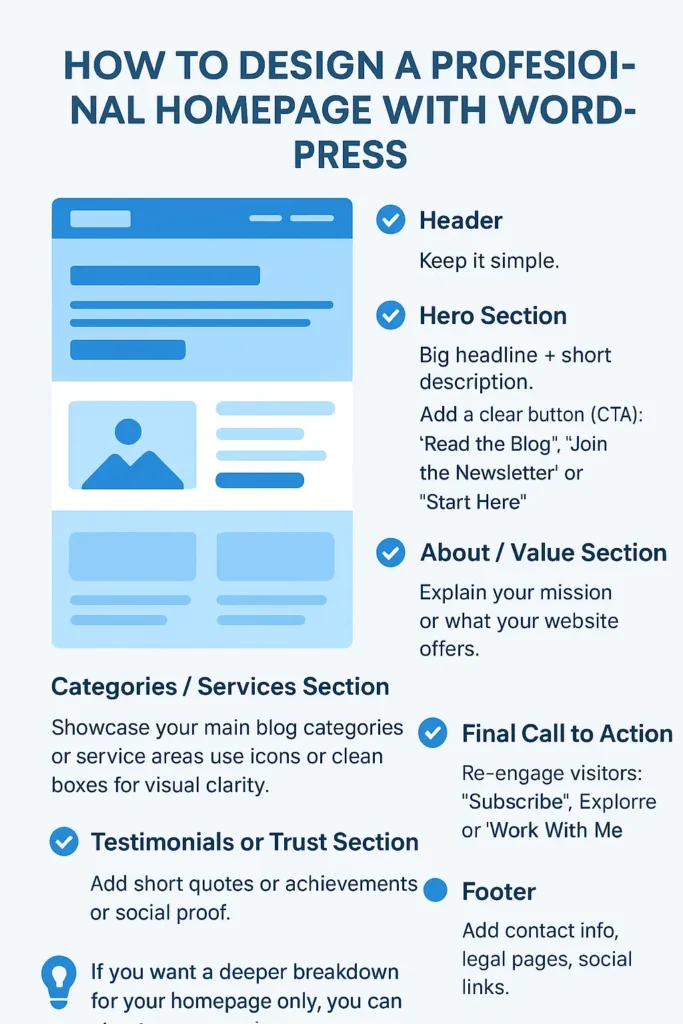
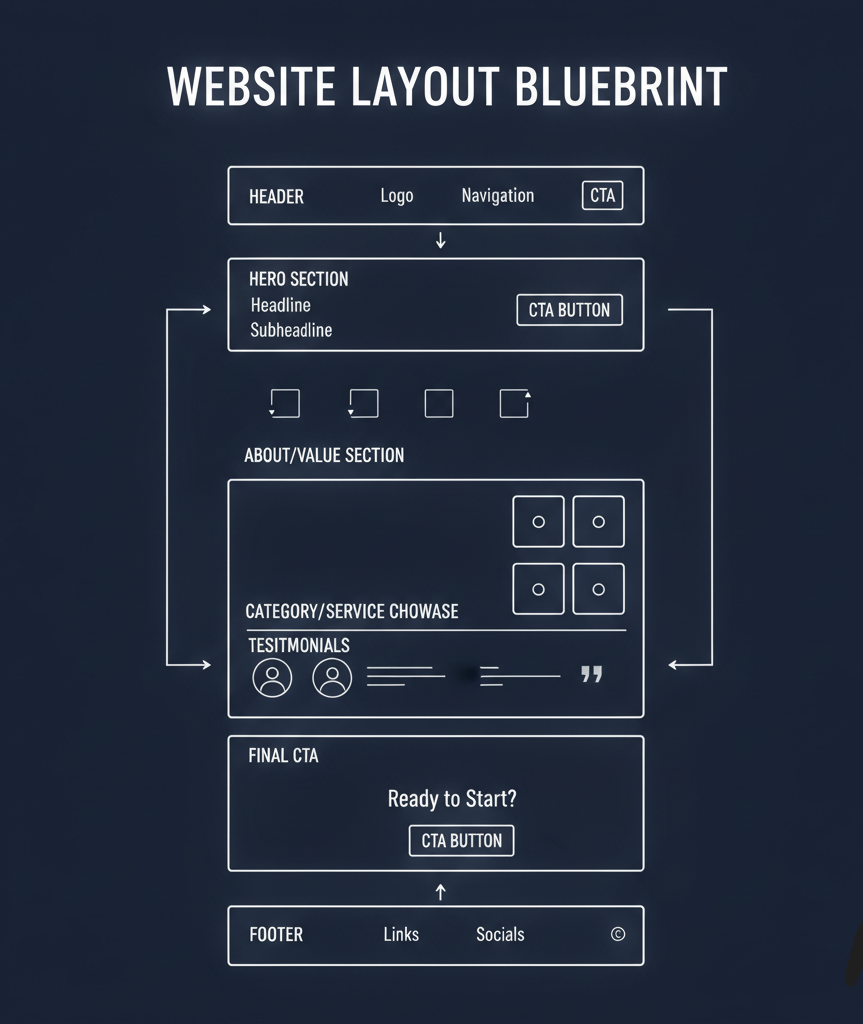
Here’s a proven homepage structure that works in almost every niche:
Header
- Keep it simple.
- Your header sets the tone for your entire website. A good structure looks like this: logo on the top left (linked to your homepage), navigation menu in the center or right, and a CTA button (‘Get Started’, ‘Contact’, or ‘Explore Blog’) that uses a contrasting color. If you’re using Elementor, add a sticky header so users can always navigate easily.
Hero Section
- Big headline + short description.
- Add a clear button (CTA): “Read the Blog,” “Join the Newsletter,” or “Start Here.”
About / Value Section
- Explain your mission or what your website offers.
- Include an image of you or your brand.
Categories / Services Section
- Showcase your main blog categories or service areas.
- Use icons or clean boxes for visual clarity.
Testimonials or Trust Section
- Social proof is gold.
- Add short quotes or achievements.
Final Call to Action
- Re-engage visitors: “Subscribe,” “Explore,” or “Work With Me.”
Footer
- Add contact info, legal pages, and social links.
if you want a deeper breakdown for your homepage only, you can check my upcoming post “How to Design a Professional Homepage with WordPress (2025)” — it’ll go deeper into layouts, fonts, and visual storytelling.
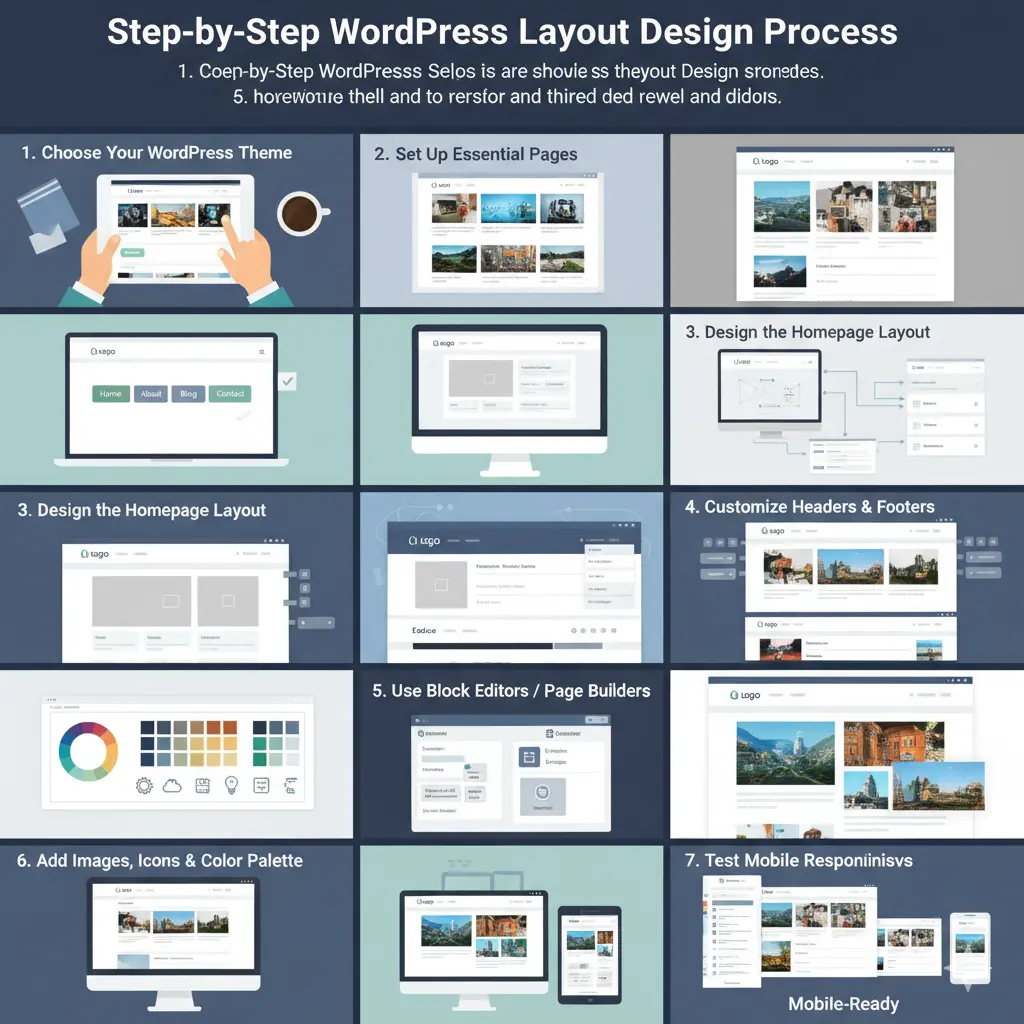
6. Step 5: Use Page Builders to Design Your Layout
Now it’s time to create that professional look — without coding.
Option 1: Gutenberg (WordPress Block Editor)
- Lightweight and built into WordPress.
- Ideal for minimal designs.
- Use “Patterns” and “Groups” to organize sections.
Option 2: Elementor (Visual Page Builder)
Perfect for drag-and-drop users.
Here’s how to design your layout using Elementor:
- Install and activate Elementor.
- Create a new page → click Edit with Elementor.
- Choose your layout structure (1-column, 2-column, etc.).
- Add widgets:
- Heading
- Text
- Image
- Button
- Divider / Spacer
- Adjust spacing with margins and padding.
- Switch to Mobile View to test responsiveness.
- Save and preview your page.
Keep consistent spacing — 60px between sections and 20–30px between elements creates visual balance.
If you haven’t yet set up your WordPress properly, you can refer to How to Install WordPress for Beginners (Step-by-Step) before starting with Elementor.
7. Step 6: Design Your Inner Pages
Once your homepage is done, apply similar structure and style to:
- About Page — your mission and story.
- Contact Page — simple form + map or CTA.
- Blog Page — clear navigation for readers.
Use page templates or duplicate your homepage layout for design consistency.
Pro Tip:
Add internal links to keep readers moving through your site.
Example: “If you’re just starting, check out my guide on How to Choose a Domain Name for Your Website.”
8. Step 7: Make Your Layout Mobile-Responsive
More than half your traffic comes from phones.
So, your design must adapt perfectly.
Inside Elementor or the WordPress Customizer:
- Click on Mobile View.
- Adjust font sizes, section widths, and button placements.
- Stack columns vertically.
- Reduce large hero images for faster load time.
Test on multiple screen sizes before publishing.
9. Step 8: Optimize and Test Your Layout
Once your design looks great, it’s time to test.
Check:
- Navigation: Can users easily move around?
- Loading speed: Use PageSpeed Insights or GTmetrix.
- Engagement: Use Google Analytics (via Site Kit) to see bounce rate and page duration.
If a page performs poorly, tweak the layout — sometimes a simple CTA or image change can boost engagement.
10. Common Mistakes Beginners Make
Here’s what to avoid while designing:
- Using too many fonts or bright colors.
- Overcrowding your homepage.
- Ignoring white space (empty space is design!).
- Not optimizing for mobile.
- Forgetting clear CTAs.
If you want to see how these mistakes connect to setup issues, check out Common WordPress Mistakes Beginners Make (and How to Avoid Them).
11. Step 9: Keep Improving and Strengthening Your Layout
Design isn’t a one-time thing.
As your website grows, your layout should evolve too.
Here’s how to maintain it:
- Update your theme regularly.
- Track performance: Which sections get most clicks?
- A/B test headlines and layouts.
- Collect feedback from visitors or friends.
Every 3–4 months, revisit your layout — tweak spacing, test new homepage structures, or adjust your typography.
These small changes make your site feel “alive” and professional.
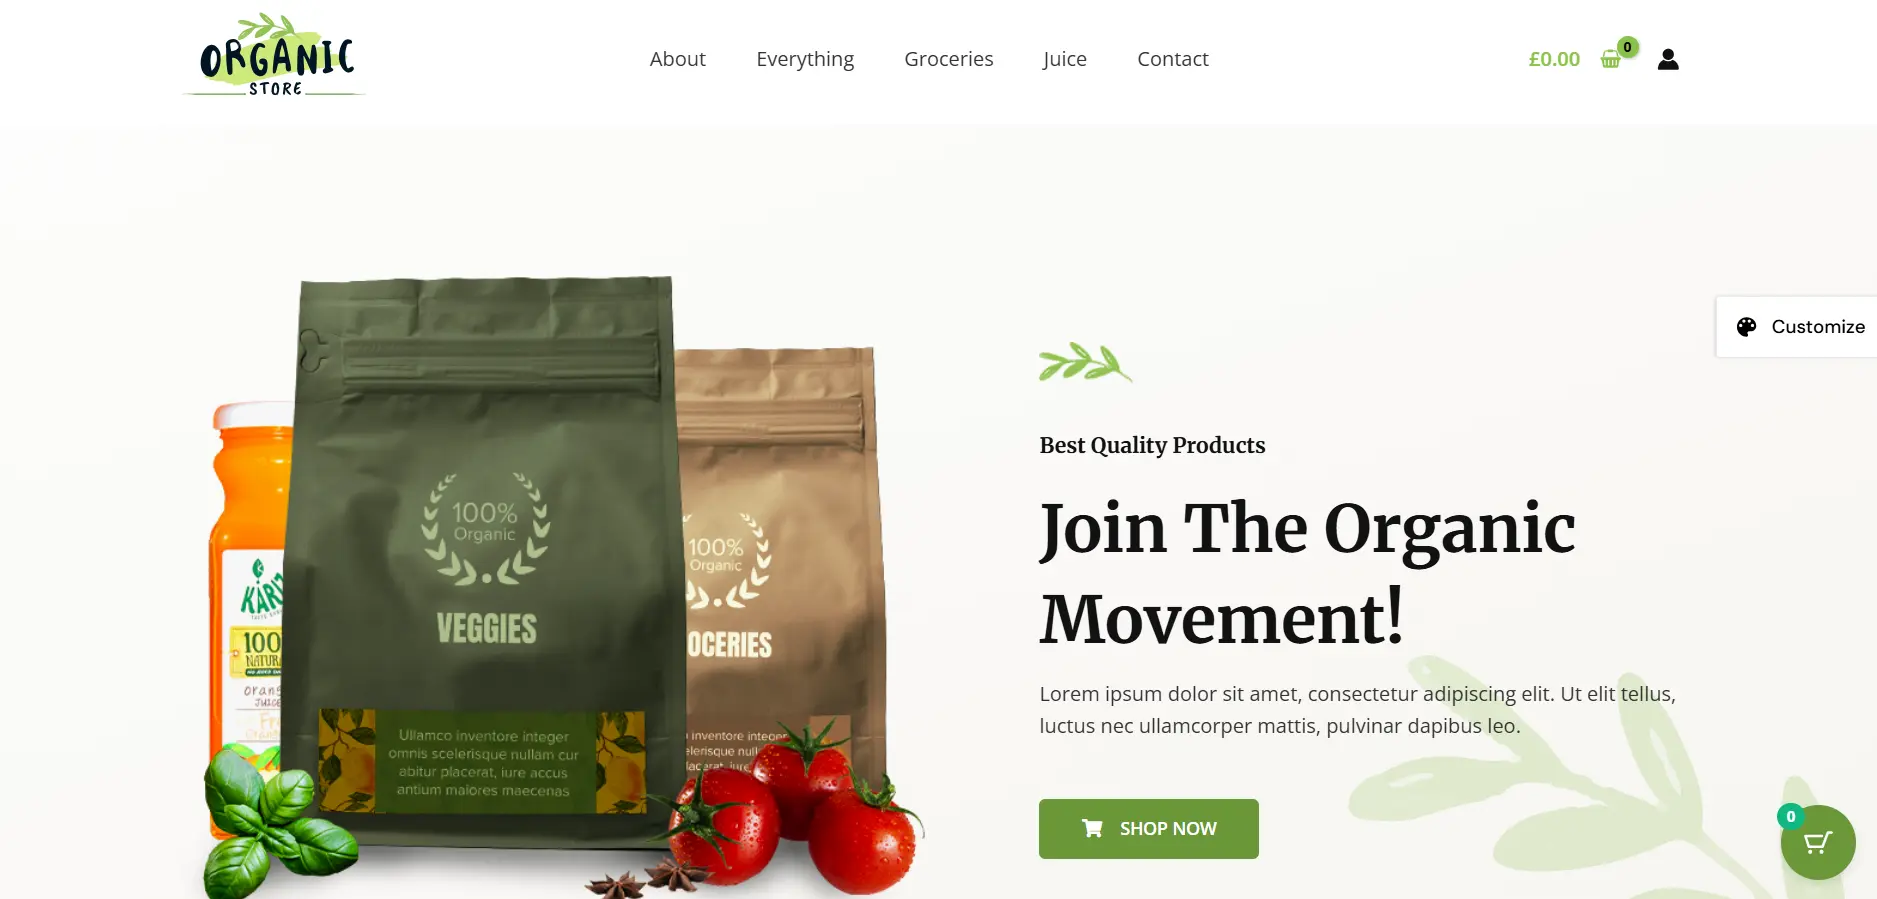
A great example of a minimalist blog layout is the Astra theme demo. It uses clean spacing, balanced typography, and an easy-to-scan layout that makes reading enjoyable. The design focuses on simplicity — which helps new bloggers keep visitors engaged without overwhelming them.
Explore Astra Demo Layout Here
What is the best layout for a WordPress website?
It depends on your goal. Blogs work best with clean, single-column layouts, while business sites need grid or sectioned layouts to highlight services.
How do I choose the right WordPress layout?
Define your website’s purpose first. Then pick a responsive, fast-loading layout that fits your content style and user experience.
What’s the difference between a layout and a theme?
A theme controls your site’s overall look, while a layout is the structure of each page (like headers, sidebars, or grids)
Which themes offer the best layout options?
Astra, OceanWP, GeneratePress, and Kadence are great choices. They’re flexible, fast, and beginner-friendly.
How do I know if my layout is user-friendly?
Test it on different devices and use tools like PageSpeed Insights to check performance and mobile optimization.
Your Layout Reflects Your Brand
Your website layout is your digital handshake — it says everything before you even speak.
A clean, structured layout builds instant trust.
It makes visitors think, “This person knows what they’re doing.”
And the beauty of WordPress?
You don’t need to hire a designer or write code. You just need structure, intention, and the right tools.
You’ve already learned how to:
- Pick a layout-friendly theme
- Use page builders like Elementor
- Structure your homepage
- Design responsive pages
- Keep improving over time
Now, you’re ready to take your next step.
If you’ve finished designing your layout, your next goal is to create your first professional homepage design — one that instantly connects with your audience.